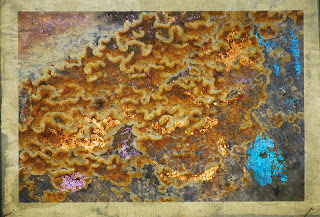
I started with one of the images that I took on my first trail run with my new (well second hand) Nikon D200.
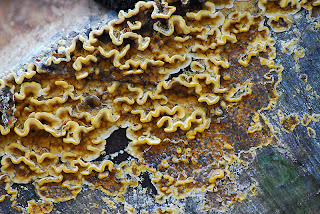
I printed this image onto Gimpy tissue, which was coated with IA iridescent gold as mentioned in the previous post.
When I removed the tissue from the paper I had stuck it to print, it left an impression behind that I thought might be useful, so I scanned it into the computer and then strengthened the color of the image by going to, image-adjust-hue/saturation and playing with the sides until I reached the color depth I was looking for.
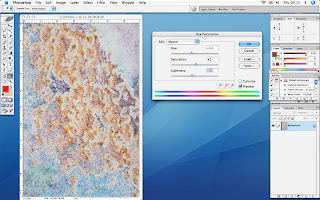
I then printed this onto a piece of Abaca tissue that was not precoated, as I didn’t need a very strong print because this was destined to go under the Gampi tissue.
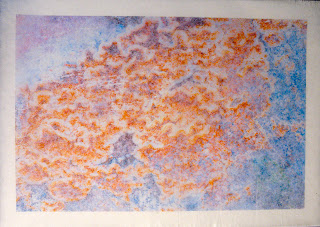
I then added some of the foil that I’d bought from Fibre in Form using the turquoise, gold, copper and purple to match the colours seen in the original image. I found the best way to achieve a distressed look with the foil was to put down a very thin layer of diluted PVA and then lay down a piece of foil, shiny side up, in the place required. I then applied the iron gently on a wool setting before the glue had dried.
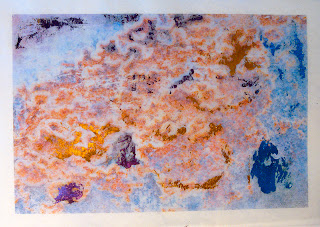
Once I was happy that I’d achieved the effect I was after I bonded the under layer to the top with Bondaweb granules.
I now thought it would be nice to add some text and played around in PS with several text layers on a background of the original image, that I had lowered the opacity on. A PS tip here is that if you want to make your BG into a layer so you can work on it with filters or lower your opacity, you only need to double click the BG in the layers palette and that will give you the option to make it a layer.
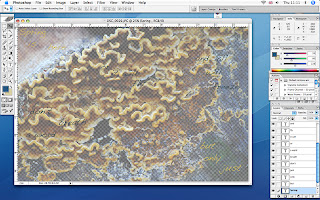
Having got the text the right colour I decided that it didn’t stand out enough so I added a treatment to it in the Layer-layer style-blending options-styles palette.
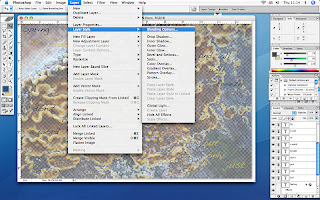
I chose a style that gave a blue glossy embossed look, but there are lots of lovely styles to play with in this palette, it’s well worth having a play!
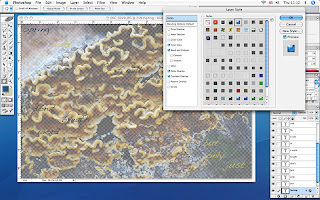
As you can see all the text is in different colours and I wanted to apply this layer style to all the text. To do this I made the BG layer disappear from view by clicking the eye in the layers palette (sorry no screen shot for this), this then just left the text layers visible. Now if you go to the layers pallet and click on the fly-out menu at the top you’ll see the options in the screen shot below. If you choose merge visible it will flatten all the text layers allowing you to apply this style to all.
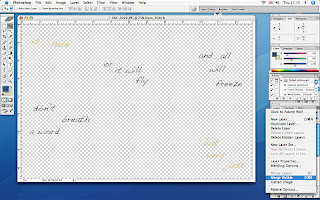
And finally you have the text layer with the embossed style over the BG layer.
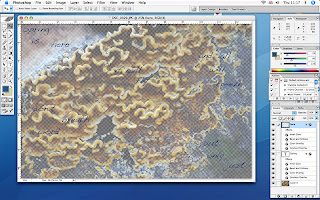
The experiments for printing this part of the piece can be seen on the previous post. I wasn’t happy with the results I had achieved with the sheer so I tried again.
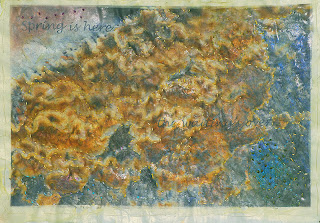
The only problem was that I made the classic mistake of not saving the image file above, or loosing it in the vast expanse of my computer’s hard drive!! So I decided to make a simpler version, and this time I used IA Semi gloss precoat on very pale yellow nylon sheer, and gave it 2 coats.
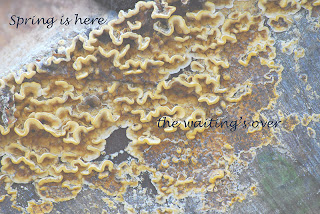
This worked far better than the previous sample, leaving very little ink on the paper and I think that may have been caused by the bubbles that I created when I coated it, haven’t quite got that one right yet!
My only concern with this technique is that it does make a very plasticized finish, which I don’t really like, but it did print a very good image on the nylon sheer, and I don’t know of another method that can achieve this.
When I bonded this top layer to the middle layer the registration of the two images we slightly out giving a blurred effect, which at the time I quite liked, but now I wonder if it would have been better to have kept the crispness of the original image.
Finally I put all the layers together and put a layer of thin wadding underneath with a backing of fine Indian cotton, bought from a luscious Indian fabric shop in Cardiff. I then proceeded to embroider over all the layers with Running stitch and French knots using hand dyed silk threads, also bought in Cardiff at the Crafts in the Bay Centre. The result was still not quite right so I tried the heat gun on it but found that the IA precoat didn’t allow the sheer to burn, so it only distressed in places where the precoat was at it’s thinnest.
I will live with this piece for a while and see if I can think how to improve it, unless anyone has any better ideas!
9 comments:
Really interesting experimentations, and an interesting peek into an area of photoshop I haven't explored yet. Have you tried using the printable fabrics, eg from Crafty Computer Paper? They're a bit more expensive but save a lot of messing around. I love the way you've built up the layers here.
This is a great tutorial Sharon, I will mark this for myself.
Brilliant Sharon -a great tutorial
Superb!
A fantastic piece of work and a brilliant tutorial. Some great ideas and techniques you have shared here Sharon.
Very interesting.
Fascinating stuff Sharon, having ruined one printer I am too nervous to try anything like this.
To reduce the plasticized finish - after printing turn it over to use and view it from the other side. You may have to up the saturation a touch for printing but as both the sheer and the coating are transparent it will be a good image.
Cheers
PS depending on the image , remember to flip the image before printing .
Cheers again
This looks like great fun Sharon. I will have to upgrade my desktop so I can run photoshop, the laptop is too clogged up with children's stuff
Oh my -- was the original pic a fungus (fungi)? It is extremely cool, whatever it is.
Of course found you through Deidre Adam's blog...thanks for popping by my rusty ol' world.
Post a Comment