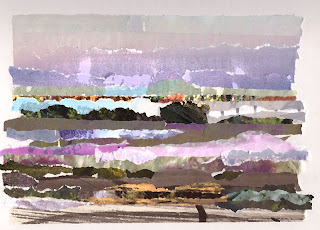
I decided to use the Hayling Island sketch as my base image. I was quite pleased with the result as the first time I tried this exercise on a Whitby holiday scene, see below, (while imitating a page from Sandra Meech’s sketch book, Contemporary quilts Design surface and Stitch p.75) I was too literal in my interpretation.
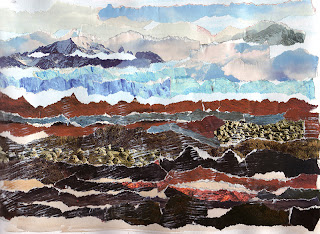
This collage was done from memory and so I suppose it would feel different to the one I’ve just done with the sketch in front of me.
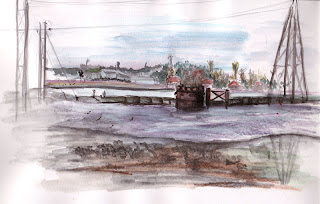
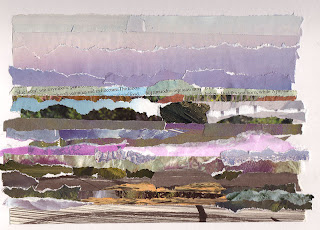
Having completed the collage I wanted to see if it would convert to an abstract painting, but as it was blowing a gale outside and nearly dark I didn’t fancy decamping up to the garden shed/studio!! So I headed for PS instead and after a couple of hours I had an abstract pattern, but not a painting, all good fun though and I learnt a lot into the bargain.
First of all I tried the pallet knife filter, which lives in the Filters-Artistic menu, after checking out most of the other filters (that’s where the time goes!)
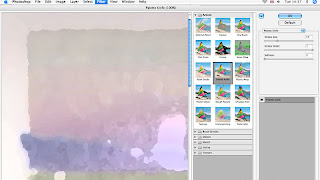
This is the result after the filter has been applied using the above settings.
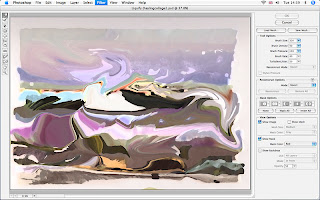
Next I decided to move the elements of the collage around as if I was painting, so I did this with the Liquify tool, which lives at the top of the filter menu. I must admit I just played with all the tools to see what they felt like, a bit like playing with different size paintbrushes.
Next I decided to see what I could do with more action so went for the wave filter, which lives in the Filter-Distort menu.
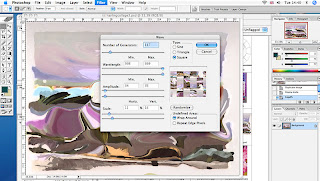
I discovered that if I chose the Square option and played around with the other controls I could get quite a nice patchwork effect! I emphasise the word play as I don’t really understand the technicalities in the various options, so lets hope there are no serious PS offianados looking at my blog!!!
Here’s the result so far:
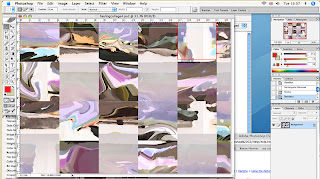
You will see from the above pic that I’m on to yet another track. I wasn’t that happy about the solid pattern lines of the squares and decided to see what the Pattern Maker could do. This lives in the same place as the Liquify tool.
I selected the red outlined square above to use as a pattern and used the selection tool to select it.
Again I just played with the various options in this filter and selected the best-generated pattern from the preview.
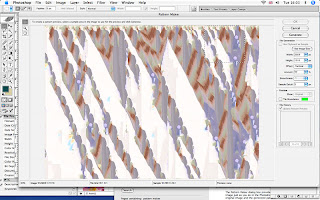
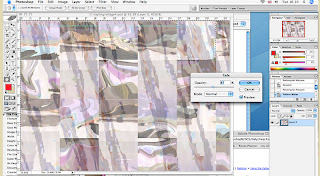
The pattern that it generated covered the original image so I selected the fade pattern option from the edit menu and dropped the opacity to 47% leaving the mode set to normal.
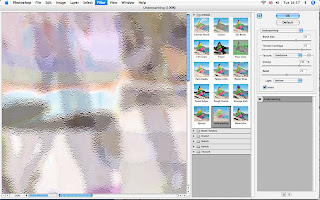
As a final touch I put an Underpainting filter from the artistic selection and put a fade on of 70%, as seen above, to give it some texture and set mode to multiply to give it a bit more depth.
As with most things there’s always one more little thing you can do and this was no exception.
Whilst rooting around the various menus I discovered the Equalise option from the Image-Adjust menu. This gave it an amazingly zany phsycadillic colour which was just a bit too OTT, so I whacked on the fade again and knocked it back to 22% but then bought it back a little by setting the mode to linear burn and ‘voila’ the finished piece.
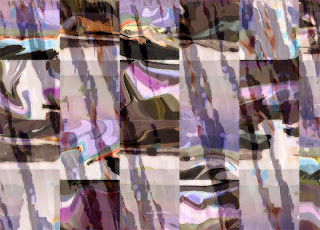
This has been completed on PS CS , which as those who are familiar with the program will know, is an older version, as the current one is CS 3, but for the time being CS does everything, and more than I need at the moment so I chose to spend my money on more exciting things than the upgrade!
11 comments:
Wow Sharon, I am really impressed. A great post! I see lots of possibility's.
Wonderful Sharon you are a very talented lady--I'm impressed
Hi
Welcome to the world of the Computer Textile Design Group.
This is what we do - we play with images to create designs which we then interpret with fibre, textile, threads and embellishments.
We also print them onto unusual surfaces as they are.
CS is more than enough.
As you have discovered - it does run away with time but as a design resource - it is infinite.
Cheers
Great studies and thanks for also sharing the tutorial. Really interesting.
I love the collages Sharon. Your colours are wonderful and pull out the stops on atmosphere.
Fabulous collages Sharon - all have real possibilities. You are so right about paint programmes eating up your time :)
Love the collage Sharon
Next step - use as a basis for a picture to stitch in Free Machine Embroidery????
Warm regards
K
Hi everyone
Thanks for all your encouraging comments! As for where to go next with it, that's when the scary stuff starts, I'll have to give it some serious thought. Possibly the FME would be a good place to start , Karen.
Wow Sharon! What an amazing outcome and a fantastic tutorial on the way! You are certainly a very talented lady! Did you photograph the screens to get your images to post here or is there a trick I don't know about for this? Do you mind if I save this post to my computer for future reference of your method, please? I'm not sure if I have your patience but I'd like to have a go.
These are great Sharon! I've been wanting to play with PSP myself, but haven't had the fortitude to sit down and play yet. I did buy Maggie G's C.D. on PSP, but haven't had a proper look at it yet. Thanks so much for showing your processes!!!
WOW you've done amazing things with that collage. My experience of PS is pretty much the same as yours - keep playing until you get what you like. Gradually this process does resolve and you get to know what you want to do without having to try absolutely everything every time!
Post a Comment